Drag the slider to adjust text size.
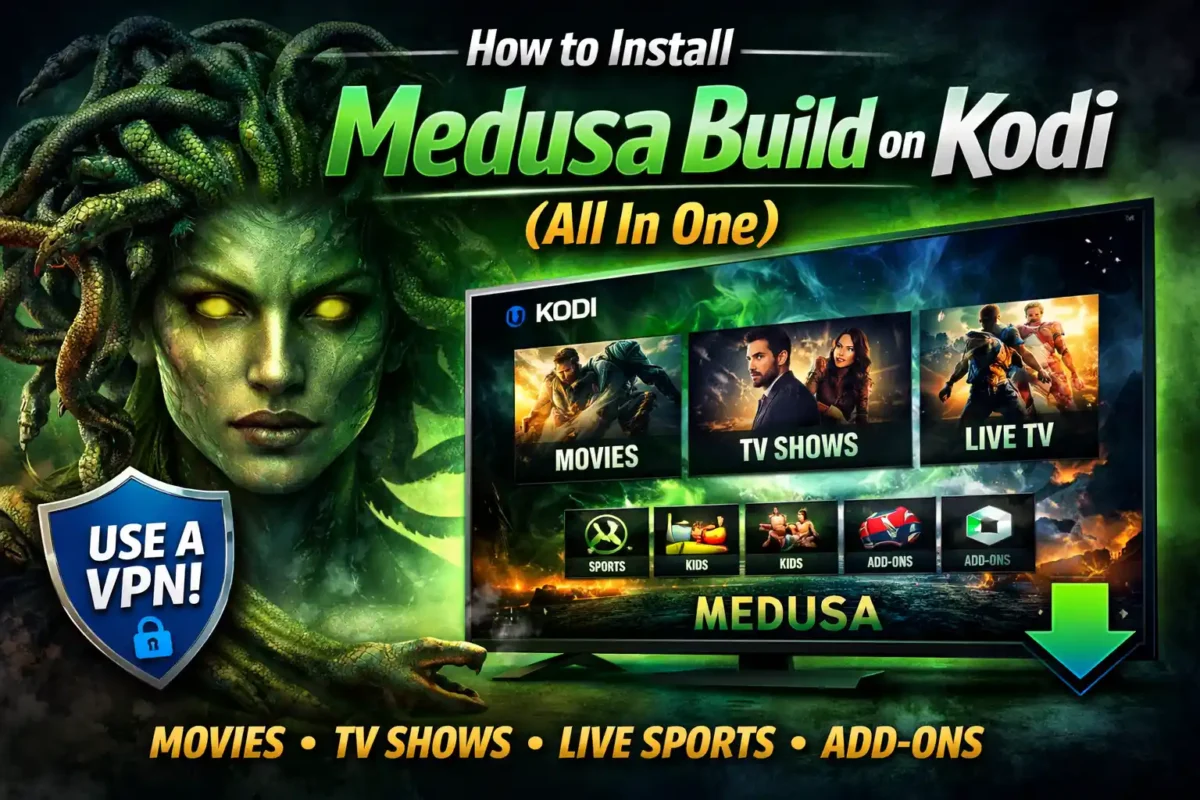
If you are tired of navigating through clunky menus and want a complete entertainment package, learning How to Install Medusa Build on Kodi is the perfect solution. Kodi is an incredible media player, but its default interface is empty. To get the most out of it, you need to add content.
🔒 Protect Your Kodi Streaming
Avoid ISP tracking and stream Kodi safely using one of the fastest and most trusted VPN services.
✔ Works with Kodi & Firestick
✔ No Logs Privacy Protection
✔ 30-Day Money Back Guarantee
Recommended for safe and private Kodi streaming
The Medusa build changes everything. It transforms your basic Kodi setup into a powerful streaming hub. As an all-in-one Kodi build, it comes pre-loaded with the best video add-ons, customized menus, and a clean user interface. Whether you want to watch live sports, catch up on the latest TV series, or enjoy free movies and TV shows, this build handles it all.
In this guide, we will walk you through the exact steps to install this build safely and quickly, even if you have never used Kodi before.
What is the Medusa Build?
When people search for the best Kodi builds, Medusa consistently ranks at the top. But what exactly does it do?
Think of a build like a custom operating system for your Kodi app. Instead of manually installing dozens of separate extensions, a build bundles them together into one package. The Medusa build is known for its lightweight design, meaning it runs smoothly on devices like the Amazon Firestick, Android TV boxes, and Windows PCs.
Here is what you get when you install it:
* A highly customized, user-friendly interface
* Top-rated video add-ons for on-demand content
* Live TV and sports streaming options
* System maintenance tools to keep Kodi running fast
Why You Need a VPN Before Installing
Before we dive into the installation steps, we need to talk about your privacy. Anytime you use third-party Kodi builds to stream content, your internet service provider (ISP) can see exactly what you are watching.
ISPs are known to throttle internet speeds when they detect heavy streaming traffic. To protect yourself, you should always use a Kodi VPN. A VPN hides your IP address and encrypts your internet traffic. This stops ISP throttling, bypasses geographic blocks, and keeps your streaming habits completely private.
Once you connect to a reliable VPN, you are ready to proceed with the installation.
How to Install Medusa Build on Kodi
The installation process requires you to download the build from a third-party repository. Do not worry—the steps are straightforward. Just follow them in order.
Step 1: Enable Unknown Sources
Kodi blocks third-party installations by default. You must change this setting first.
- Open Kodi on your device.
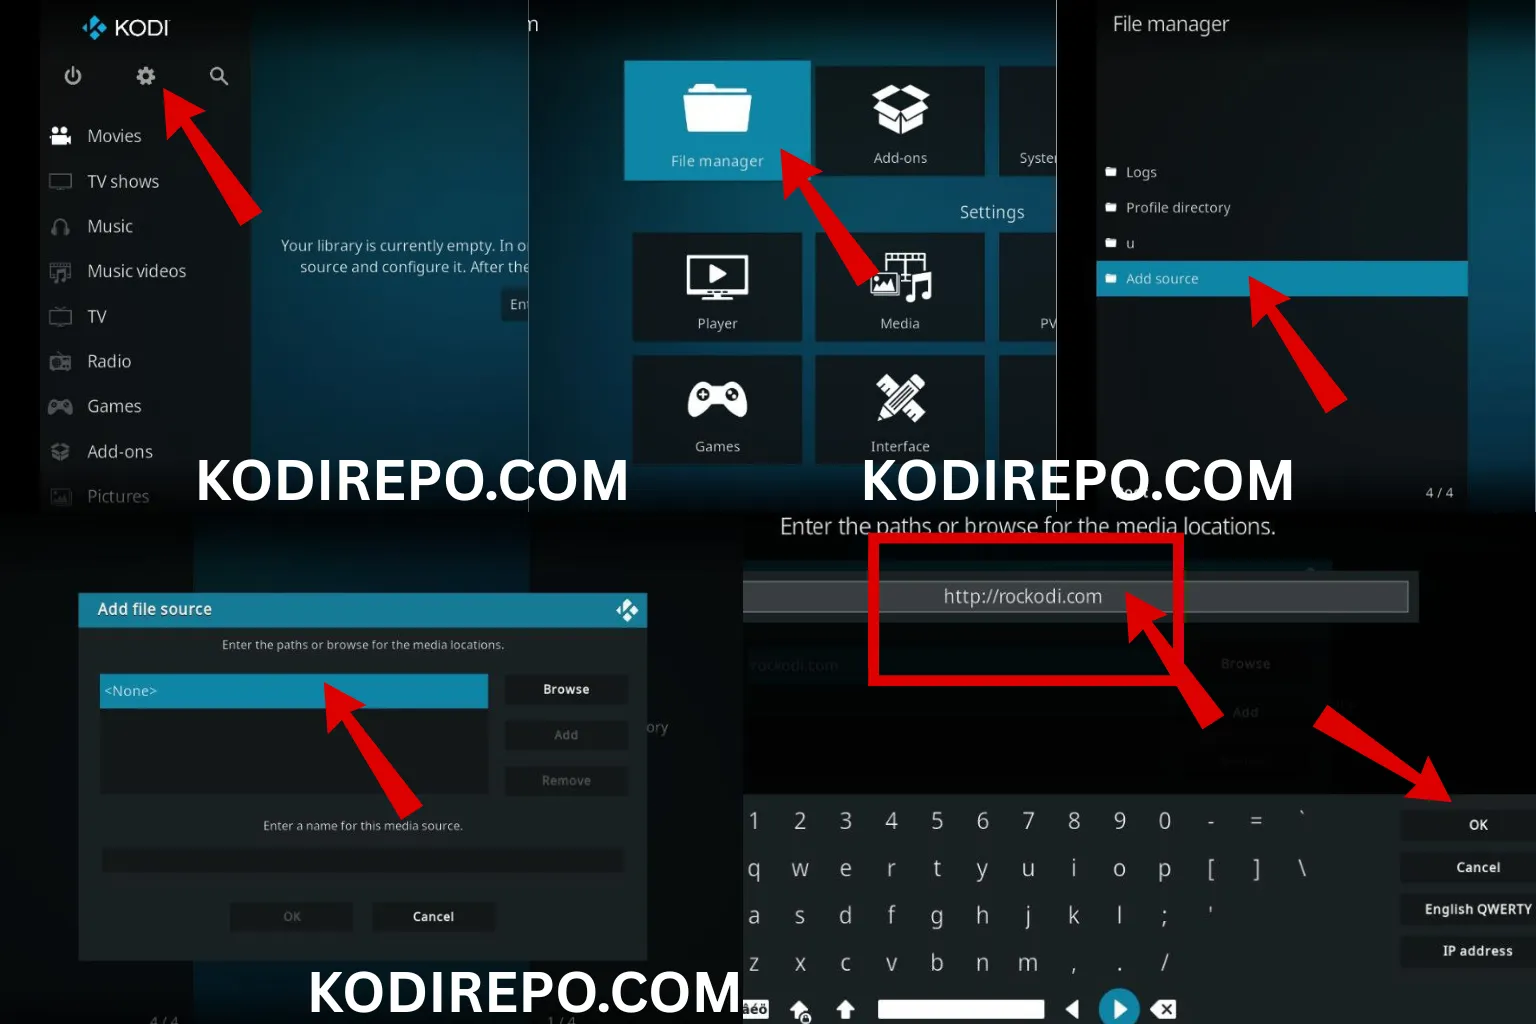
- Click the Gear icon in the top-left corner to enter the System menu.
- Select System on the left sidebar (or “System Settings” on older versions).
- Click on Add-ons on the left menu.
- Toggle the switch for Unknown sources to turn it ON.
- A warning message will appear. Click Yes to confirm.
Step 2: Add the Medusa Wizard Source
Now, we need to tell Kodi where to find the installation file.
- Go back to the main Kodi Settings menu.
- Click on File Manager.
- On the left side, double-click Add source.
- Click on the box that says .
- Type in the exact URL for the Medusa Wizard: https://the666mafia.github.io/repo/
- Click OK.
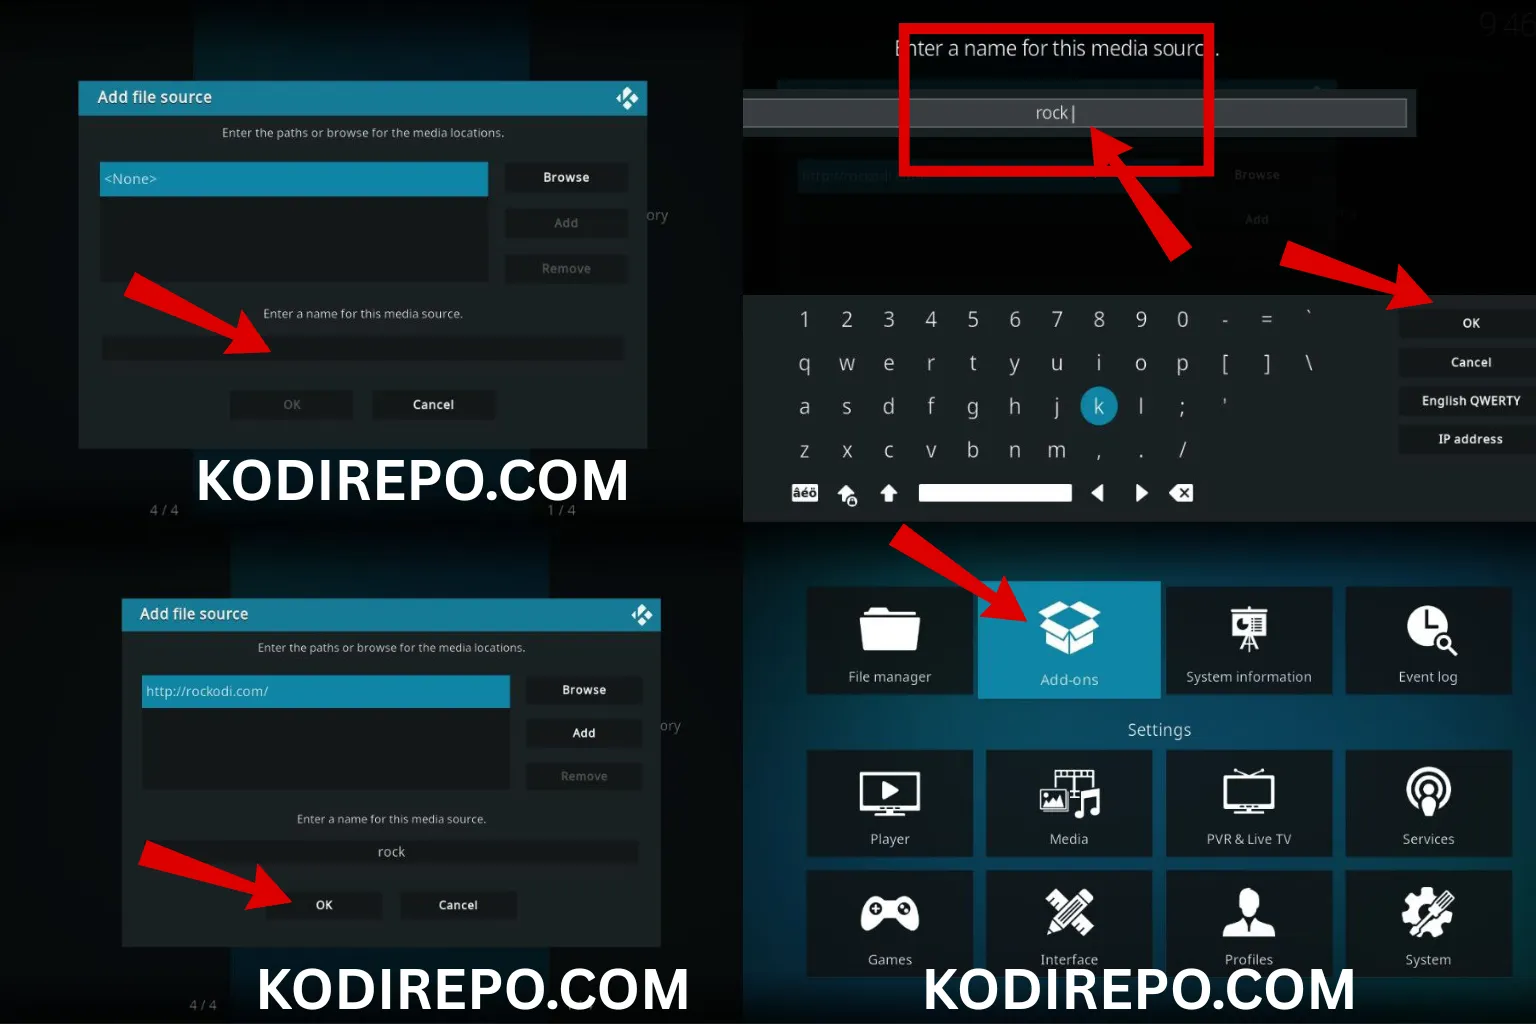
- Highlight the empty box underneath where you just typed. Name this media source
medusaand click OK.
Step 3: Install the Repository
Next, we install the repository that holds the build.
- Press the Back button on your remote or mouse to return to the Kodi home screen.
- Click on Add-ons from the main menu.
- Select the open box icon at the top (this is the Add-on browser).
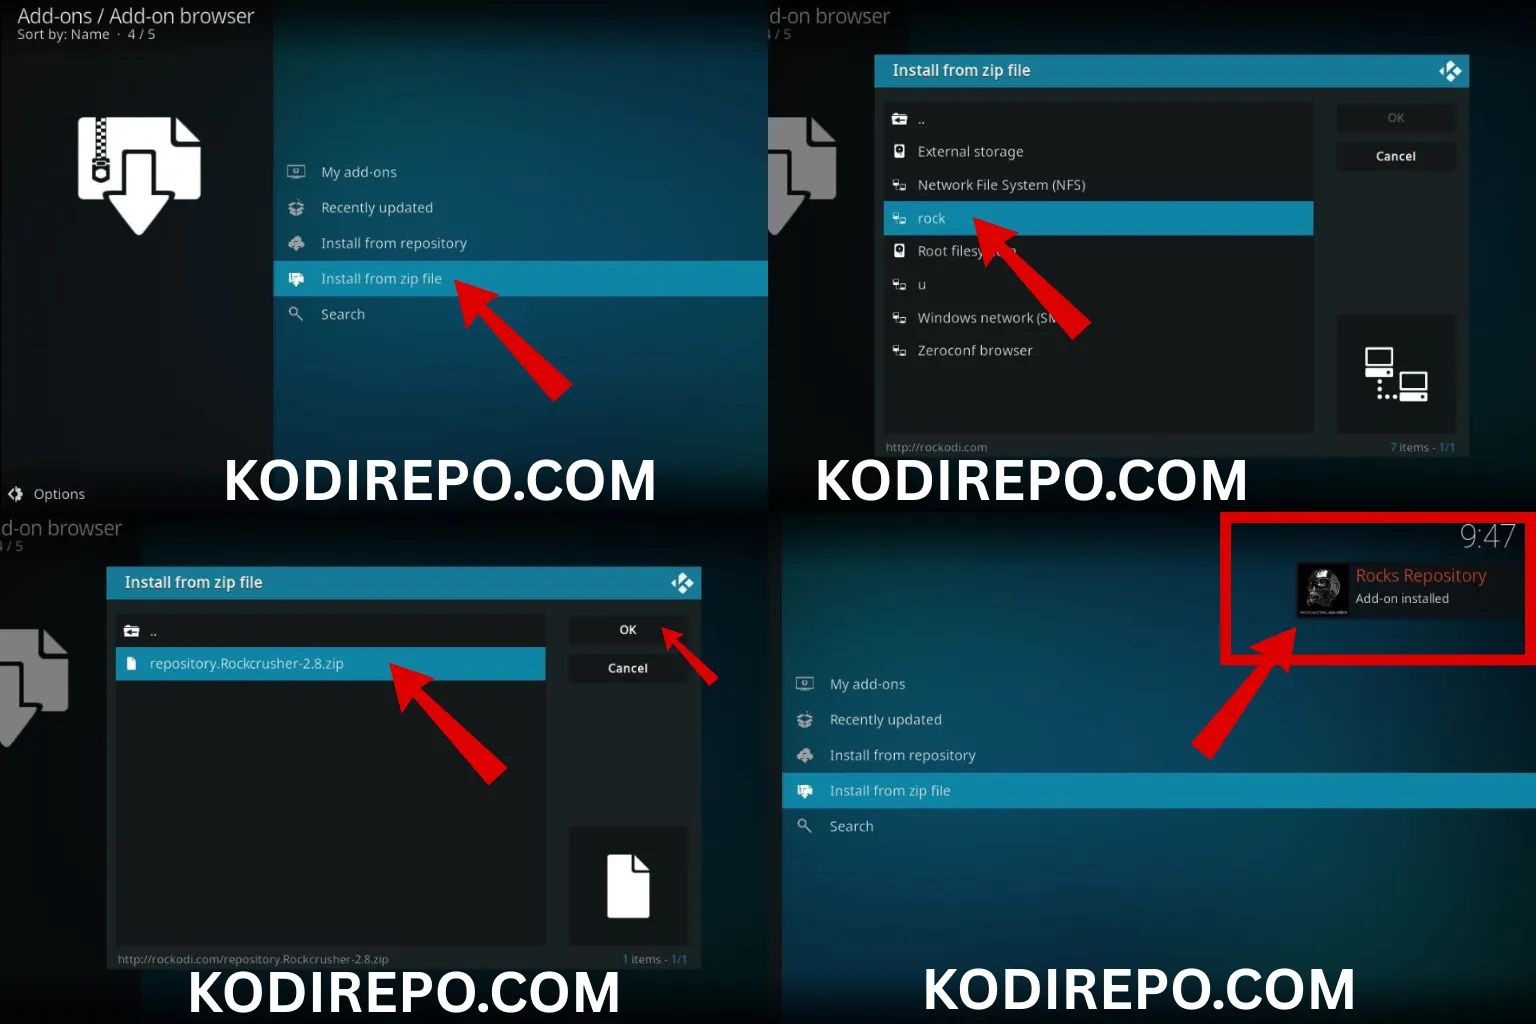
- Choose Install from zip file.
- A new box will appear. Select medusa (the name you gave the source in the previous step).
- Click on the zip file that appears (usually named something like
repository.medusa-x.x.x.zip). - Wait a few seconds. You will see a notification in the top-right corner saying the repository was installed successfully.
Step 4: Install the Medusa Build
Now that the repository is active, you can finally install the build.
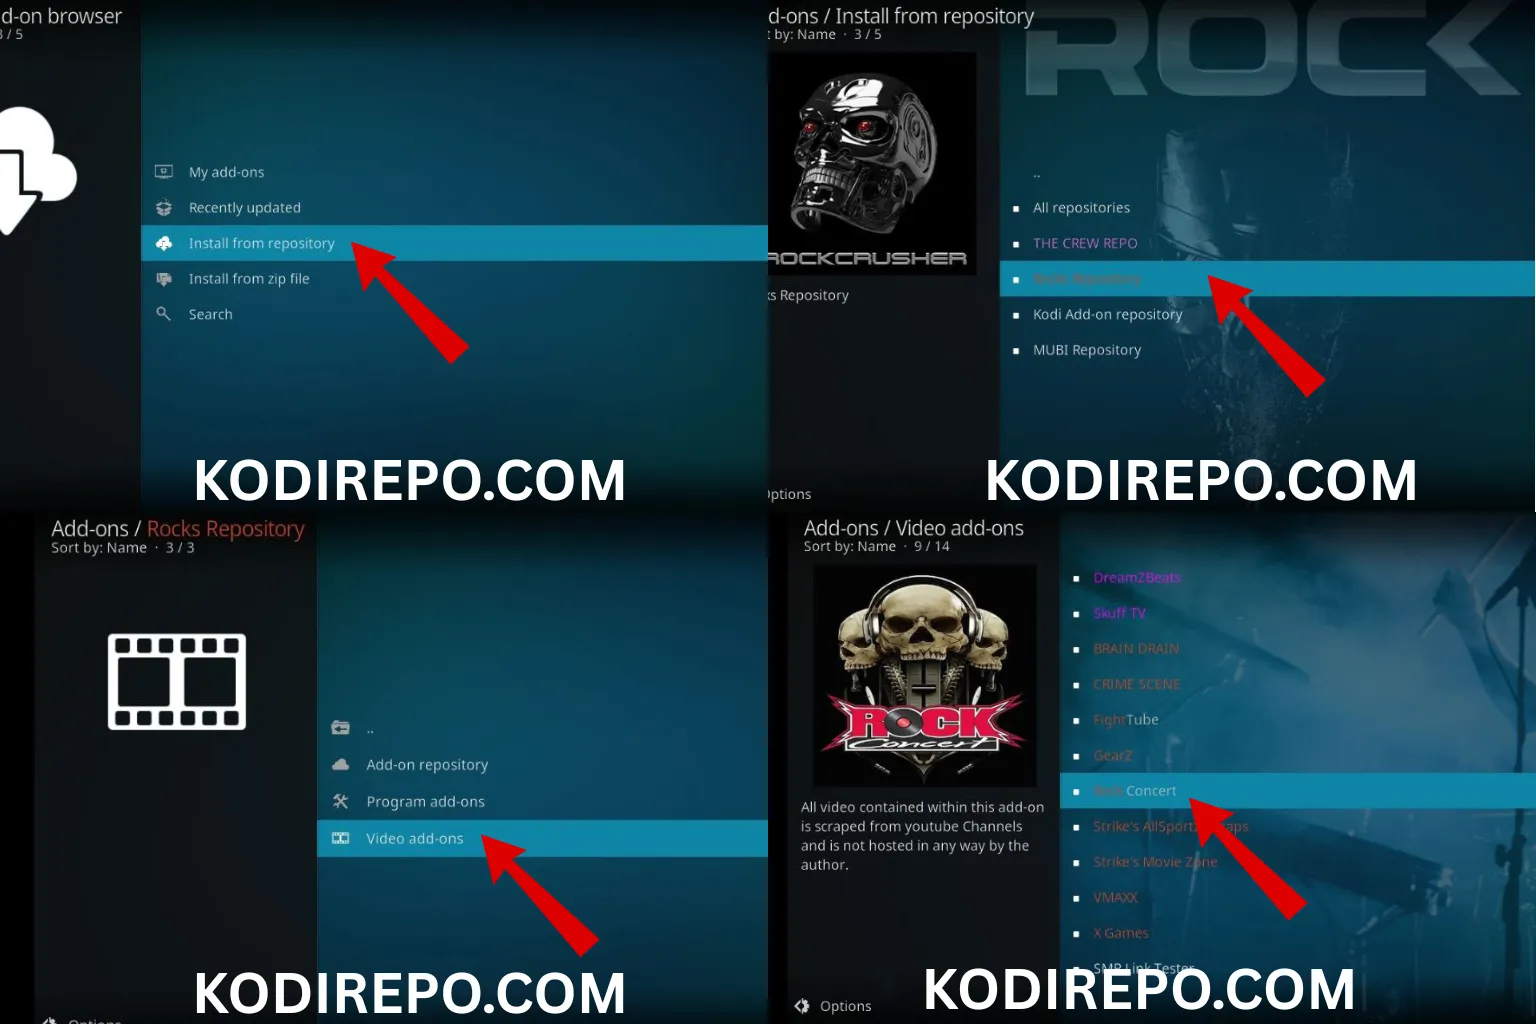
- Click Install from repository.
- Select Medusa Repository (or the exact name of the repo you just installed).
- Click on Program add-ons.
- Find and select Medusa Wizard.
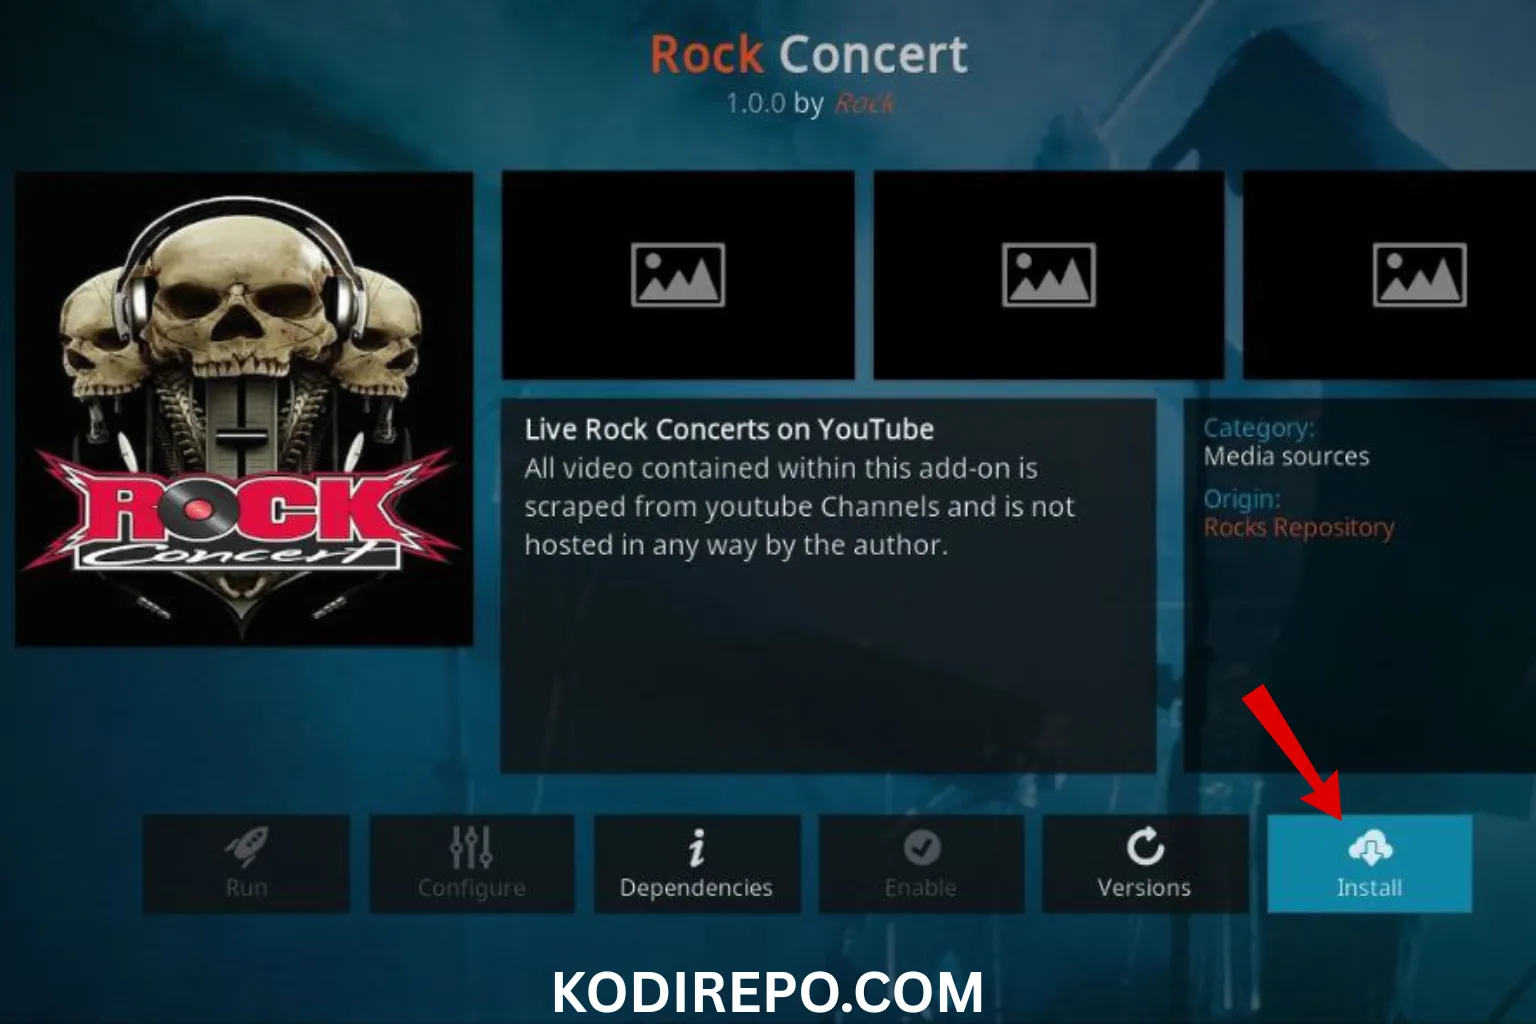
- Click Install at the bottom right.
- Wait for the addon enabled notification.
Step 5: Run the Build
Now it is time to load the actual build onto your Kodi app.
- Go back to the Kodi home screen.
- Click Add-ons.
- Open the Medusa Wizard.
- Select the Medusa (All In One) option from the menu.
- You will be asked if you want a “Fresh Install” or a “Standard Install.”
- Fresh Install: This erases all your current Kodi data. This is highly recommended to prevent old add-ons from conflicting with the new build.
- Standard Install: Keeps your existing add-ons. Only use this if you know what you are doing.
- Select Fresh Install.
- Click Continue.
- Kodi will now download and install the build. This can take anywhere from 3 to 10 minutes depending on your internet speed.
- When the prompt says “Kodi needs to restart to apply changes,” click OK.
What to Expect After Installation
When Kodi reopens, your screen will look completely different. The default blue interface will be replaced by the custom Medusa skin.
The first time a build loads, it might take a few minutes to pull in all the menus, backgrounds, and widget data. Give it time. Do not panic if it seems frozen or slow at first.
Once it fully loads, you will see neatly organized categories on the home screen. You can easily browse through Movies, TV Shows, Live TV, Sports, and more. Everything is just one click away.
Troubleshooting Common Errors
Sometimes, technology does not work perfectly on the first try. If you run into issues, here are the most common fixes:
- “Could not connect to repository”: This means the URL you entered is either wrong, or the Medusa server is temporarily offline. Double-check your spelling in the File Manager. If it is correct, wait an hour and try again.
- The build is lagging or buffering: Go into the Medusa Wizard maintenance tools and clear your cache. If it still buffers, check your internet connection or try switching VPN servers.
- Add-ons are not working: Third-party Kodi add-ons are maintained by independent developers. They frequently go offline and require updates. Open the Medusa Wizard and look for an “Auto Update” or “Fix Build” option to refresh the broken links.
- Kodi freezes on startup: Force close the Kodi app completely from your device’s settings or task manager, then reopen it.
Is Medusa Build Safe and Legal?
This is a very common question in the Kodi streaming community. The Medusa build itself is perfectly safe to install. It does not contain malware or viruses. However, the build does provide access to unofficial, third-party streaming add-ons.
It is important to understand the difference between official and unofficial add-ons. Official add-ons (like YouTube, Netflix, or Tubi) are completely legal. Unofficial add-ons scrape the internet for free content. While using these add-ons is generally not illegal for the end-user, streaming copyrighted content without a license operates in a legal gray area in many countries.
This is exactly why using a Kodi VPN is so important. It ensures that no one can monitor your activity while you navigate these third-party streams.
Final Thoughts
Upgrading your media player with an all-in-one package saves you hours of manual setup. By following this guide on How to Install Medusa Build on Kodi, you have instantly transformed a blank piece of software into a premium streaming powerhouse.
Remember to keep your build updated through the wizard, clear your cache regularly, and always keep your VPN active. Enjoy your seamless streaming experience!