
Drag the slider to adjust text size.
The Skyline Addon is a popular choice among Kodi users looking for a wide variety of live TV channels, including webcams from around the world. Whether you’re a beginner or an experienced Kodi user, this guide will walk you through the installation process step by step. By the end of this article, you’ll have the Skyline Addon up and running on your Kodi device, ready to stream your favorite content.
🔒 Protect Your Kodi Streaming
Avoid ISP tracking and stream Kodi safely using one of the fastest and most trusted VPN services.
✔ Works with Kodi & Firestick
✔ No Logs Privacy Protection
✔ 30-Day Money Back Guarantee
Recommended for safe and private Kodi streaming
What is the Skyline Addon?
The Skyline Addon is a third-party Kodi addon that provides access to a vast library of live TV channels, movies, and webcams. It’s particularly popular for its extensive collection of webcams, allowing users to explore live feeds from different locations globally. The addon is free to use and is regularly updated to ensure smooth functionality.
Why Use the Skyline Addon?
The Skyline Addon stands out for several reasons:
- Wide Range of Content: From live TV channels to webcams, it offers something for everyone.
- User-Friendly Interface: The addon is easy to navigate, even for beginners.
- Regular Updates: The developers frequently update the addon to fix bugs and add new features.
- Free Access: Unlike many streaming services, the Skyline Addon is completely free to use.
How to Install the Skyline Addon in Kodi
Before you begin, ensure that your Kodi is updated to the latest version. The installation process involves enabling unknown sources, adding a repository, and installing the addon. Follow these steps carefully:
Step 1: Enable Unknown Sources
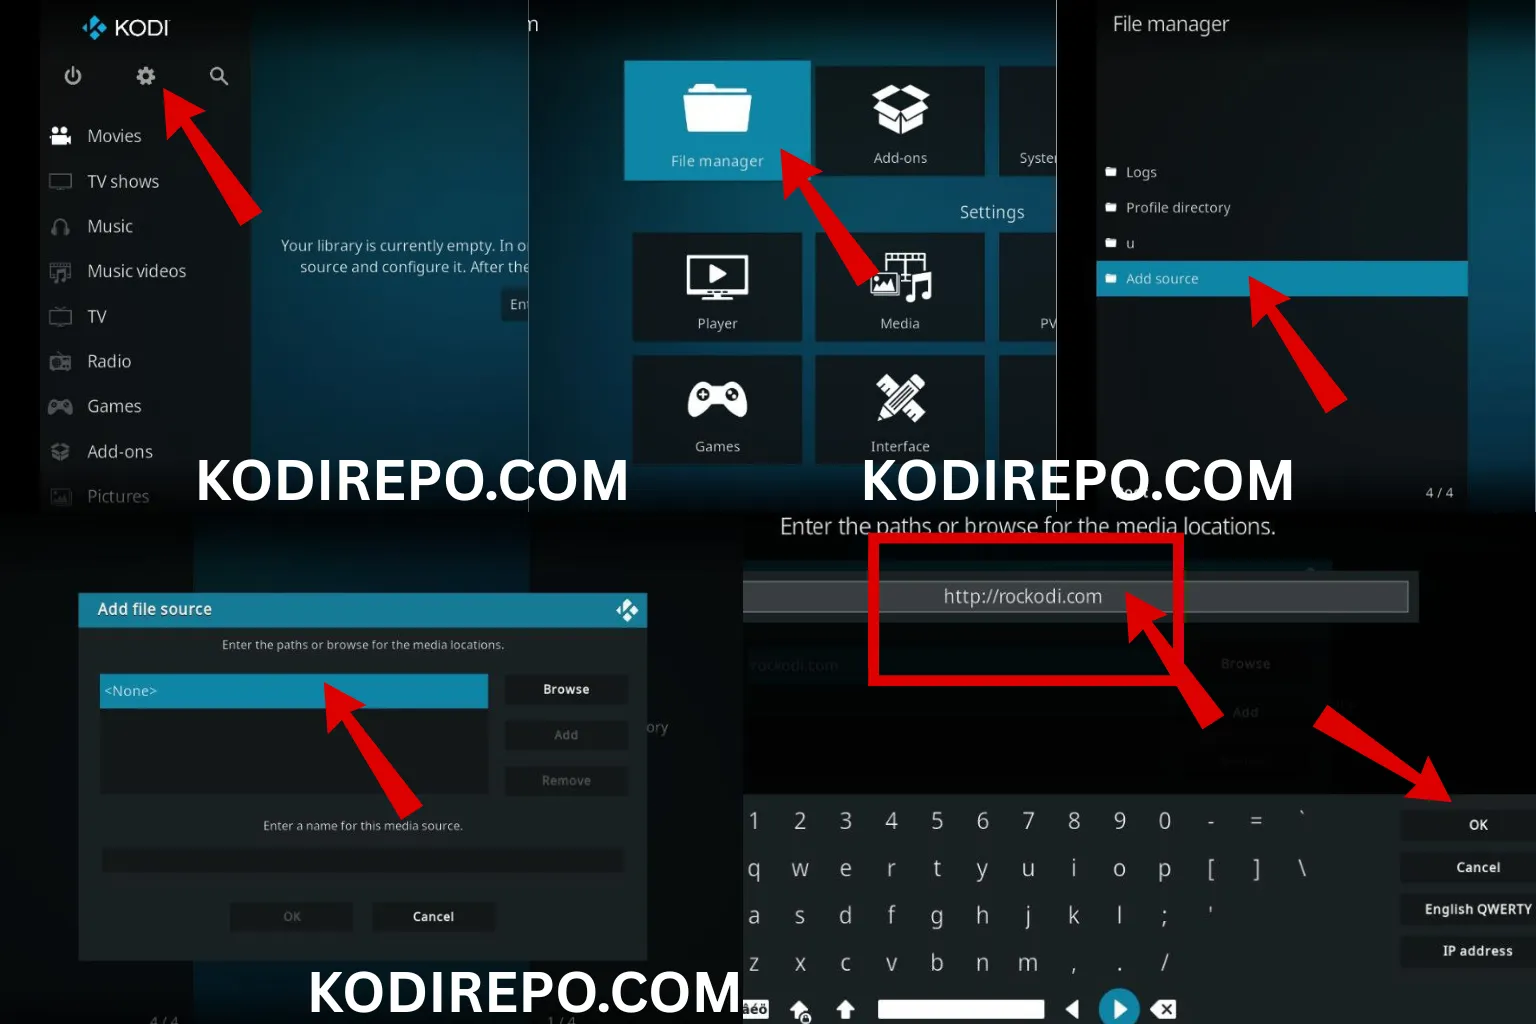
- Open Kodi and click on the Settings icon (gear icon) in the top-left corner.
- Navigate to System Settings > Add-ons.
- Toggle on Unknown Sources and confirm the warning message.
Step 2: Install the Skyline Repository
⚠️ WARNING: Before installing this Kodi addon, it is strongly recommended to use a VPN to protect your privacy while streaming.
👉 Get 76% NordVPN Deal- Go back to the Settings menu and select File Manager.
- Click on Add Source and then .
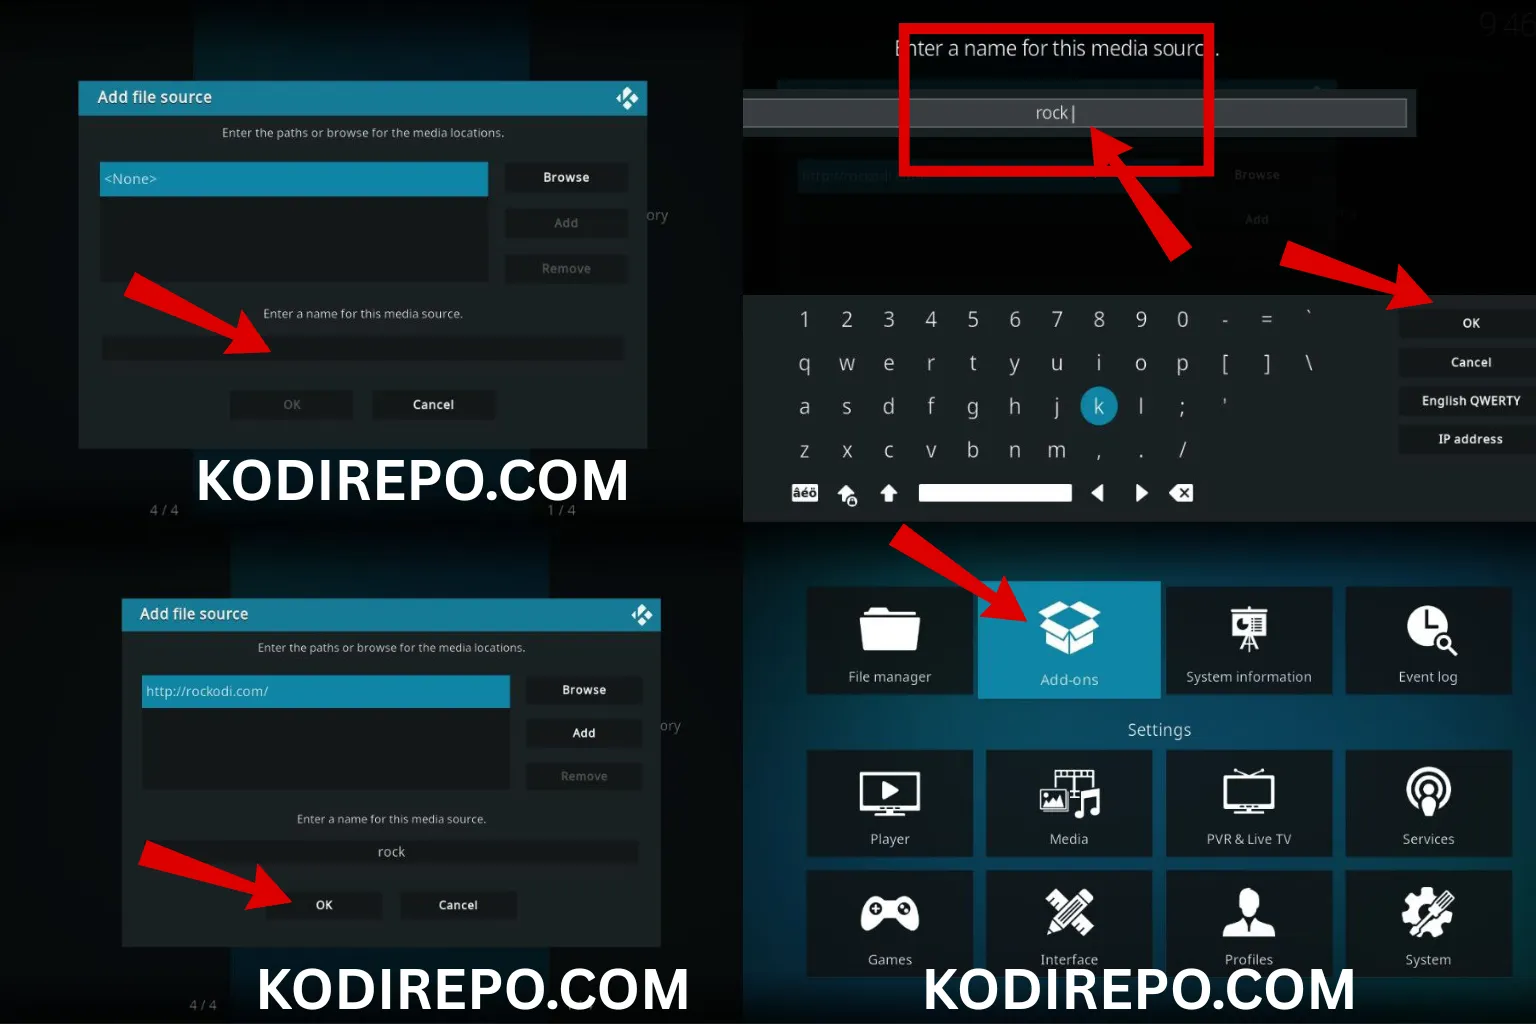
- Enter the following URL: https://bugatsinho.github.io/repo and click OK.
- Name the source (e.g., “Skyline”) and click OK.
- Return to the Settings menu and select Add-ons.
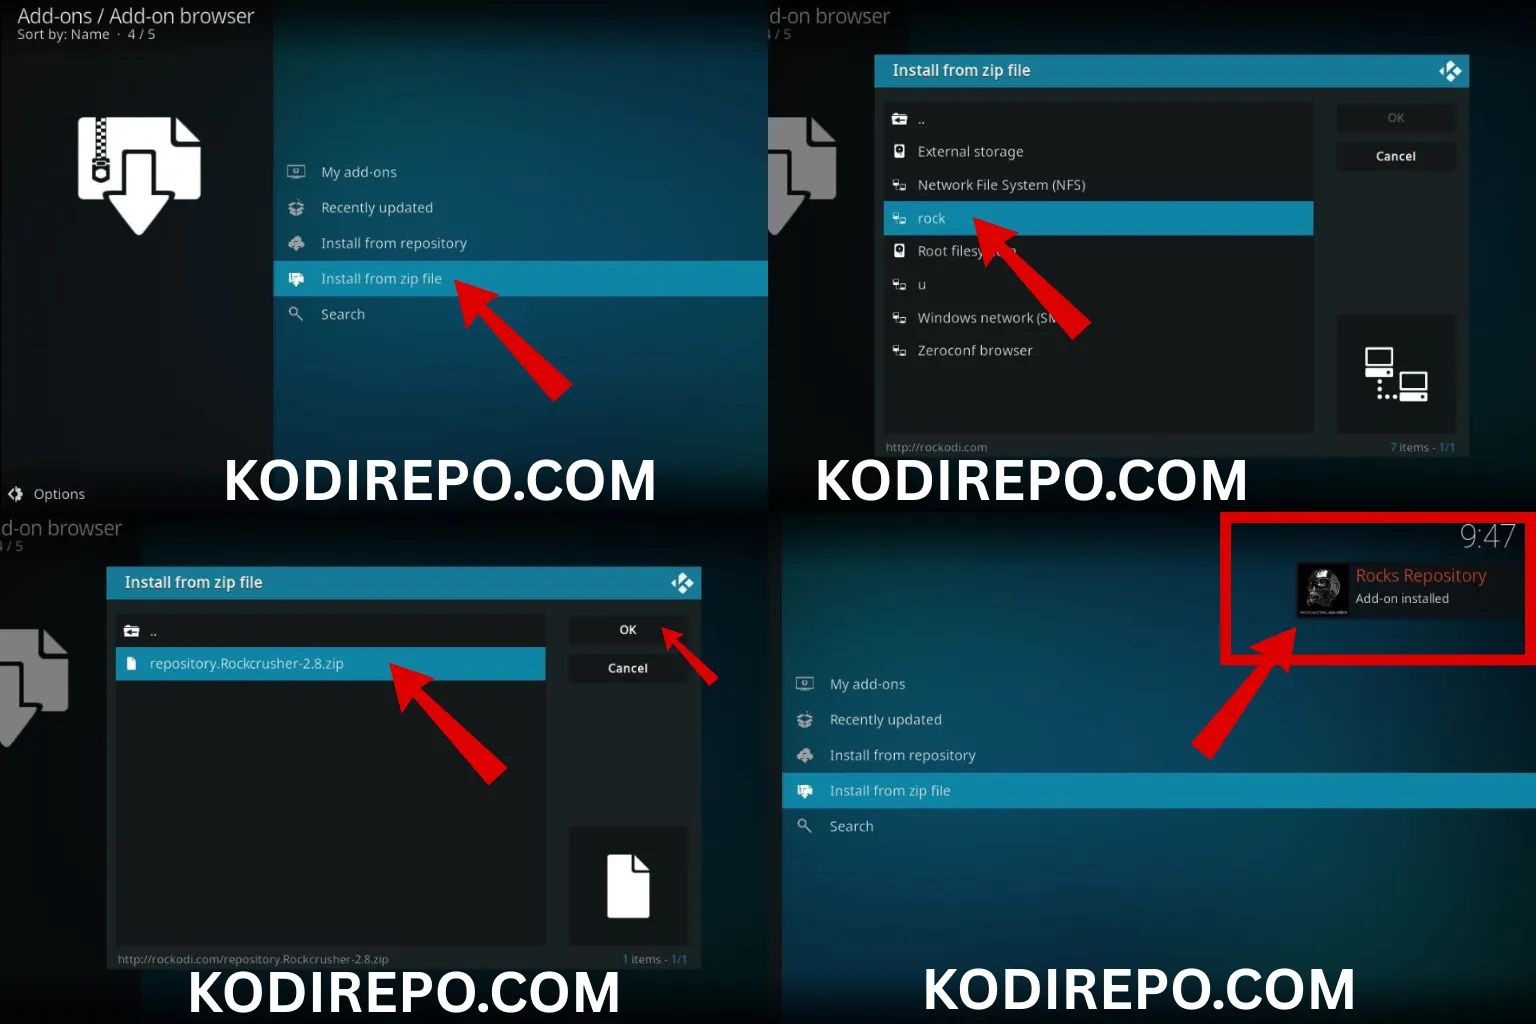
- Click on Install from zip file and select the source you just added.
- Choose the repository file (e.g.,
repository.skyline.zip) and wait for the installation to complete.
Step 3: Install the Skyline Addon
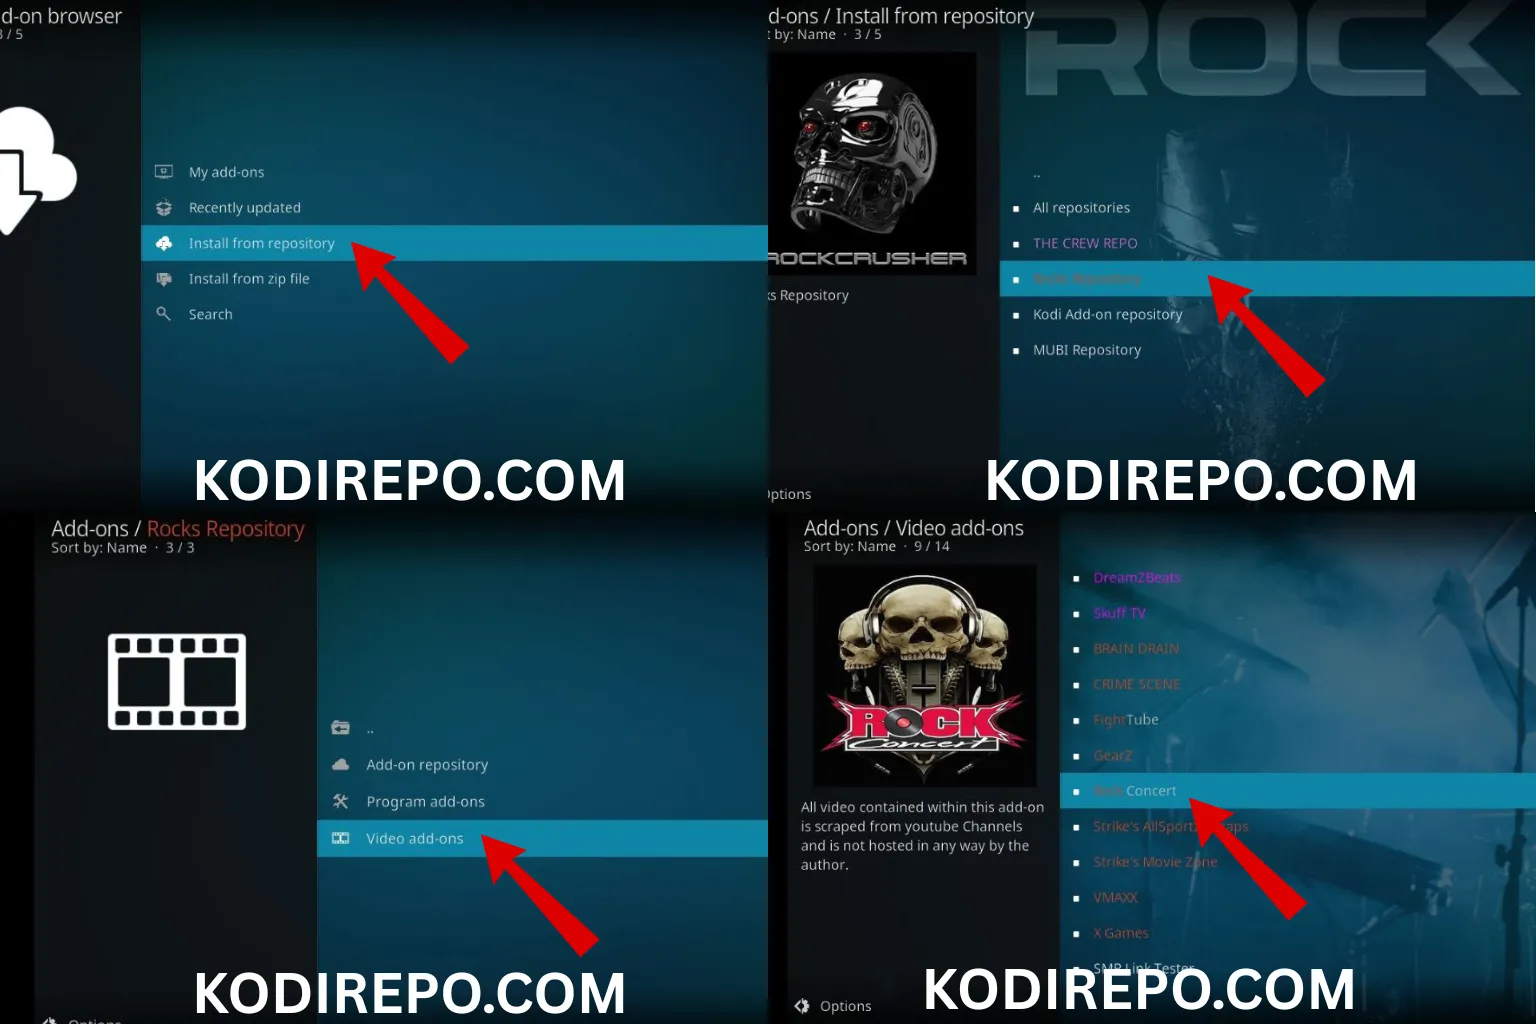
- After installing the repository, go to Add-ons > Install from repository.
- Select Skyline Repository and navigate to Video add-ons.
- Find and click on Skyline Addon.
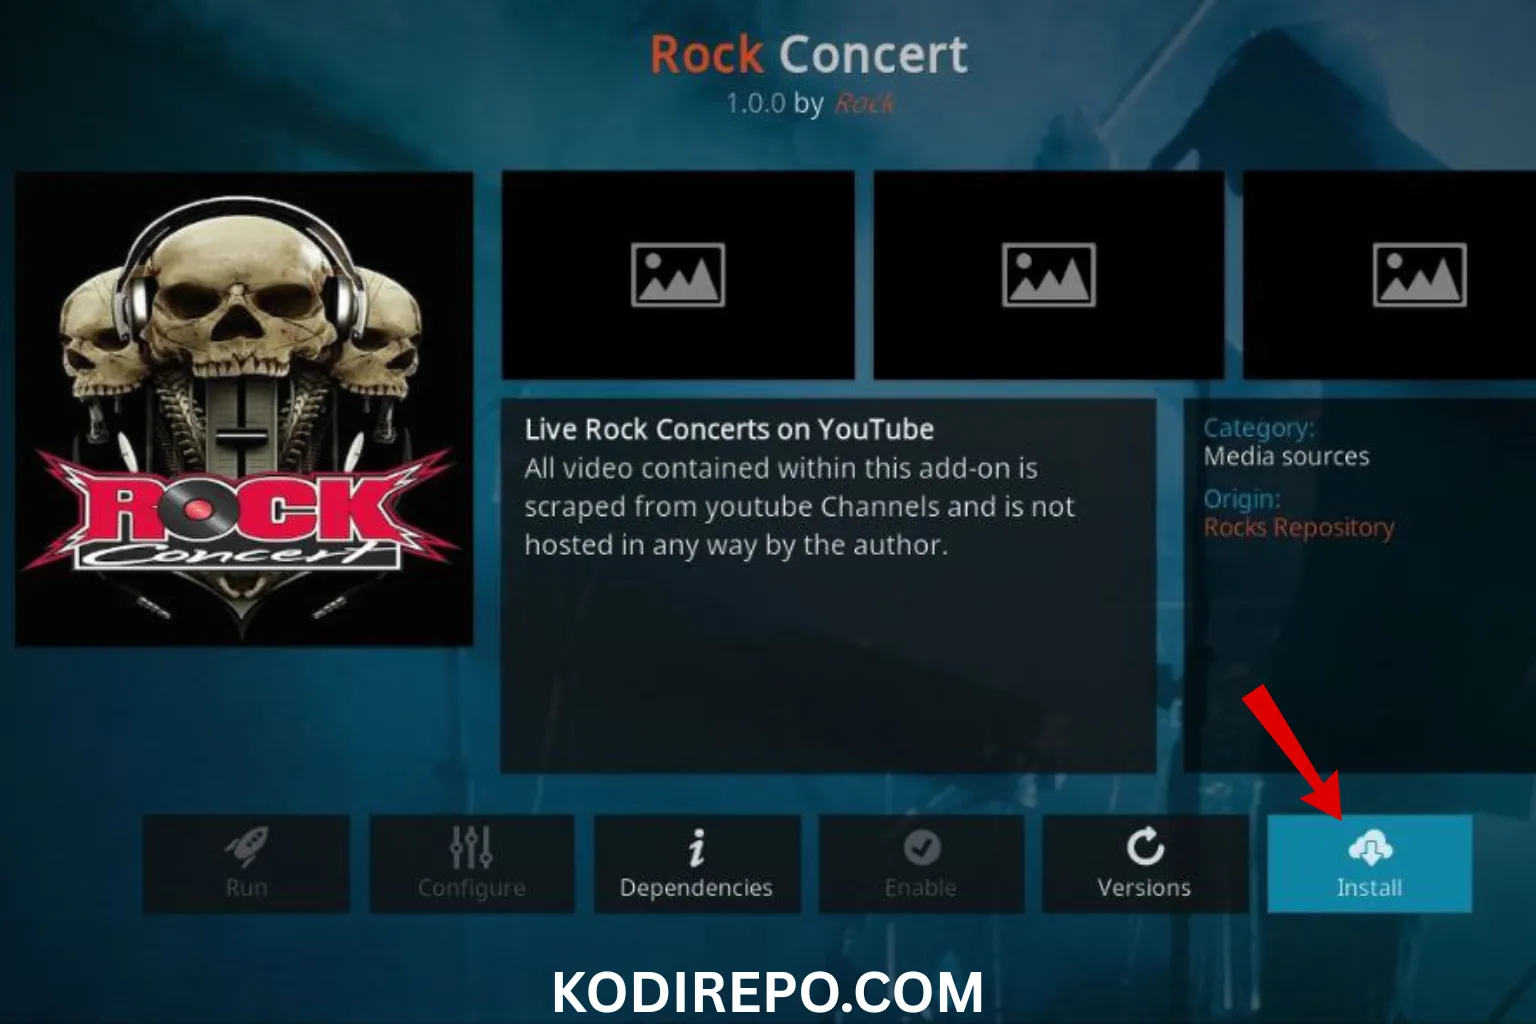
- Click Install and wait for the addon to be installed.
Step 4: Access the Skyline Addon
- Once installed, the Skyline Addon will appear in the Add-ons section.
- Click on it to explore its content, including webcams, live TV, and more.
Tips for Using the Skyline Addon
- Use a VPN: To protect your privacy and access geo-restricted content, consider using a VPN while streaming.
- Clear Cache: Regularly clear the addon’s cache to ensure smooth performance.
- Update Regularly: Keep the addon updated to enjoy the latest features and bug fixes.
Troubleshooting Common Issues
If you encounter issues while installing or using the Skyline Addon, try the following:
- Addon Not Working: Ensure that your Kodi is updated and that the repository URL is correct.
- Buffering Issues: Check your internet connection or try a different server within the addon.
- Missing Content: Some content may be geo-restricted; use a VPN to access it.
Conclusion
The Skyline Addon is a versatile and user-friendly Kodi addon that offers a wide range of content, including webcams from around the world. By following the steps outlined in this guide, you can easily install and start using the addon on your Kodi device. Whether you’re a beginner or an experienced user, the Skyline Addon is a great addition to your Kodi setup.
With its extensive library and regular updates, the Skyline Addon ensures that you’ll always have access to the latest content. So, why wait? Install the Skyline Addon today and elevate your Kodi experience!